Subscribe by RSS RSS Icon

Rooting and flashing ROM on a HTC Desire

It’s gona be an year since I got my HTC Desire and I realized, I still haven’t really got the most out of it, so I finally decided to root my phone, and get a custom ROM for my Android.

What is rooting?

'root' is actually the user account that has full access to all commands and files on a Linux operating system. Since, Android is based on Linux kernel, gaining root gives you full control over your Android and this process is called rooting. iPhone users call this jailbreaking ;)

So why root?

  1. Install custom ROMs
    There are many ROMs which are customized for many improvements such as speed and performance. For example, the popular CyanogenMod, created by one of Android's most notable hackers, optimizes performance for both the G1 and MyTouch 3G handsets. (readwriteweb.com)
  2. Overclocking
    Overclocking sets the clock rate for the processor for speed or to save battery, but do with caution, it could damage your phone. SetCPU allows overclocking your Android, and it also has different power schemes.
  3. Increase your internal memory
    A2SD+ allows to install applications on a Linux partition (ext2, ext3, ext4) on your SD card, which behaves as your internal memory. It can be done by creating a partition using Linux or using ROM Manager. Most custom ROMs comes with A2SD+ support.
  4. Move applications to SD card
    This feature is already included in Froyo (Android 2.2), which allows some applications to be moved to SD card.
  5. Titanium Backup
    Titanium Backup allows to backup, restore, and freeze your applications with its data, including protected applications.
  6. Nandroid backup
    Nandroid allows to take full system backup and also restore them using recovery mode such as ClockworkMod Recovery.
  7. MarketAccess
    MarketAccess gives access to applications including paid ones, which are not available in your country or operator, by emulating the SIM card of a chosen operator.
  8. Wifi tethering
    Allows to tethering your 3G/2G internet via Wifi or bluetooth from your Android. Wifi tethering feature is also now included in Froyo (Android 2.2) as Wi-Fi Hotspot.
  9. Take screen shots!
    I know, stupid isn't it? You can't even take a screen shot without root access. See market for screen shot applications.
  10. Install custom themes, addons, and more!
  11. Because you can! :D
    Seriously, wouldn't you want to see your phone's full capability? Now that I've 11 reasons to root, I should totally root my phone! Of cause it'll void my warranty, but its only a small chance to screw up my phone, and I'm willing to take that chance.

Getting ready to root

Making backup

Before you root, don’t forget to backup your data, unless you’re going to completely wipe everything and skip this step ;)
If you’re using your Google account for your contacts, calendar and mail, you don’t need to worry about them because it’ll come back after you sync again. Other than that, you might want to backup your messages, call log and other application data. There are a couple of good applications in the market for that, such as SMS Backup & Restore, Backup Everything, and Astro File Manager. You might want to backup your SD card too just in case ;)

Warning: by rooting, you’re voiding your warranty, and I won’t be responsible for any damage that you may cause to your phone, so use this at your own risk :)

Rooting has now become pretty much easier as just a few clicks – thanks to Unrevoked! Although there’s a small possibility to get your phone bricked, it’s still ALMOST impossible so let’s not worry about that now eh? ;) This method usually works for most of the HTC phones (see Unrevoked), and for other Android phones check out XDA-Developers :) Before begin to root, make sure your phone is fully charged. Alright, let’s get on with it!

Installing HTC drivers

  1. Download HTC Sync (mirror: HTC Sync for all HTC Android phones v3.0.5511) software for your phone from HTC website.
  2. Run the installation, and install the required items.
  3. We just only need the HTC drivers (adb drivers) for now, so cancel the installation of HTC Sync after installing the required items. If you’ve already installed HTC Sync, make sure you uninstall it before proceeding to prevent interference with the rooting process.

Installing HBOOT driver

Click here for video walk through on how to install HBOOT drivers.

  1. Download the modified HBOOT USB drivers (mirror), and extract it somewhere.
  2. Turn off your phone, connect your phone to your computer with your USB cable, boot into HBOOT by holding volume down button and power button, and wait for the HBOOT USB PLUG message on the screen.
  3. Open Device Manager on your computer by right clicking on Computer, click Properties, then Device Manager.
  4. Right click on the Android 1.0 and select Update Driver Software.
  5. Select Browse my computer for the driver software, browse to the extracted HBOOT driver folder, then click Next. If you get any warnings during the install, just click OK. Once the driver is installed, click Close. You can turn your phone back on, by removing the battery and power on the phone.

...and finally...rooting!

Click here for a video walk through of on how to flash.
  1. Go to Unrevoked website, choose your phone and download the reflash package (mirror: v3.32).
  2. Plug your phone to your computer with your USB cable and make sure the connection is in Charge Only mode.
  3. Turn on USB Debugging mode by going to Settings > Applications > Development > and check the USB Debugging.
  4. Run the reflash application and sit back. Your phone will restart a couple of times. Do not turn off your phone or interfere the process.
  5. That’s it! You’re now rooted!

Flashing ROM/radio

First of all, I wanted to try the new Gingerbread (Android 2.3), so I flashed the CyanogenMod 7, which is still in development (nighty). CyanogenMod releases doesn't have the HTC Sense UI, and I like the Sense UI better so I decided to go back to a Froyo (Android 2.2) ROM with Sense UI. I did a couple of research in XDA-Developers forum and found out most users prefer LeeDroid.
Since now its rooted, it's possible to flash custom ROMs and radio. Flashing ROM and radio is pretty easy to do after you've rooted using Unrevoked, since it installs ClockworkMod Recovery also with it.

Backup (Nandroid)

Before flashing a ROM its safe to take a backup, just in case if something wrong. ClockworkMod Recovery allows you to take a full Nandroid backup of your phone.
  1. Turn off your phone, press volume down and power button, and it'll take you to HBOOT menu.
  2. Go to Recovery by pressing volume down, and press power button to select. Once you're in ClockworkMod Recovery menu, use your trackpad to scroll and select.
  3. Go to backup and restore, select backup, and it'll backup the whole phone which can be later recovered using the recover option.

Anyways, lets flash a ROM now!

  1. Download LeeDroid ROM or any ROM you prefer. You can find many ROMs in XDA-Developers forum ;)
  2. Download the latest radio (mirror: 32.49.00.32U_5.11.05.27).
  3. Copy the ROM and radio file into your SD card.
  4. Turn off your phone, press volume down and power button, and it'll take you to HBOOT menu.
  5. Go to Recovery by pressing volume down, and press power button to select. Once you're in ClockworkMod Recovery menu, use your trackpad to scroll and select.
  6. Select Wipe data/factory reset, and Wipe cache partition too.
  7. Select Install zip from SD card, Choose zip from SD card, and then select your ROM file.
  8. The ROM installation will take place.
  9. After ROM installation is over, go to Choose zip from SD card again, and run the radio installation.
  10. Go back and select Reboot your phone.

...and that's it! Happy rooting! :D

Check out the Everything Desire index for more hacks, ROMs, radio, themes, and updates at XDA-Developers.

Thanks to:
Google and HTC for the awesome phone
Unrevoked for the painless root
LeoDroid for the awesome ROM
RMD for the rooting guide
djR3Z for the walk through video

How to backup your Windows Live Messenger application data

I recently installed a 2TB hdd and I did a fresh Windows installation. Believe me or not, it didn’t change anything at all! My desktop, documents, application settings, and even Windows Live Messenger (WLM) were just the same! Of cause, I took a nice backup! ^^...and I know how you’ll feel if you lost all your emoticons! ;) This is a simple guide to backup your WLM for those who doesn’t want to lose their emoticons and display pictures :P

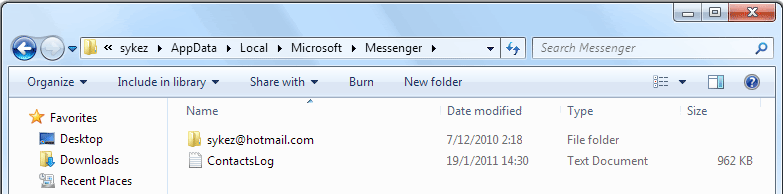
All your WLM data’s are stored in C:\Users\xyz\AppData\Local\Microsoft\Messenger, where xyz is your windows username. You’ll see all the email(s) that have been signed in from your messenger as folders.

Copy your email’s folder and put it in a safe place. After you’ve installed windows and WLM again, paste the folder back right exactly where you found it. Sign in and voila! :D

Note: I haven't checked with WLM 2011 yet, but it works perfectly on WLM 2009 :)

Prince of Persia The Fogotten Sands


"Marking the next-gen console debut of Ubisoft's critically acclaimed series, Prince of Persia - The Forgotten Sands is the next chapter in the Sands of Time universe. Visiting his brother's kingdom following his adventure in Azad, the Prince finds the royal palace under siege from a mighty army bent on its destruction. His brother Malik decides to use the ancient power of the Sand in a desperate gamble to save the kingdom from total annihilation. To save the kingdom, the Prince must embark on an epic adventure in which he will learn to bear the mantle of true leadership, and that great power often comes with a great cost." (prince-of-persia.us.ubi.com)

Check out the gameplay trailer ;)


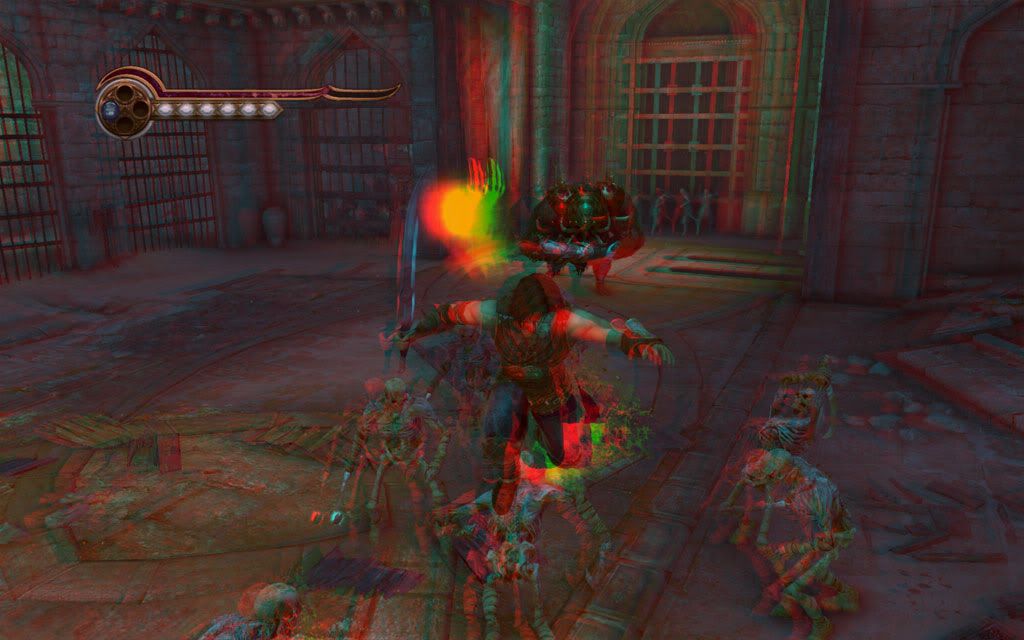
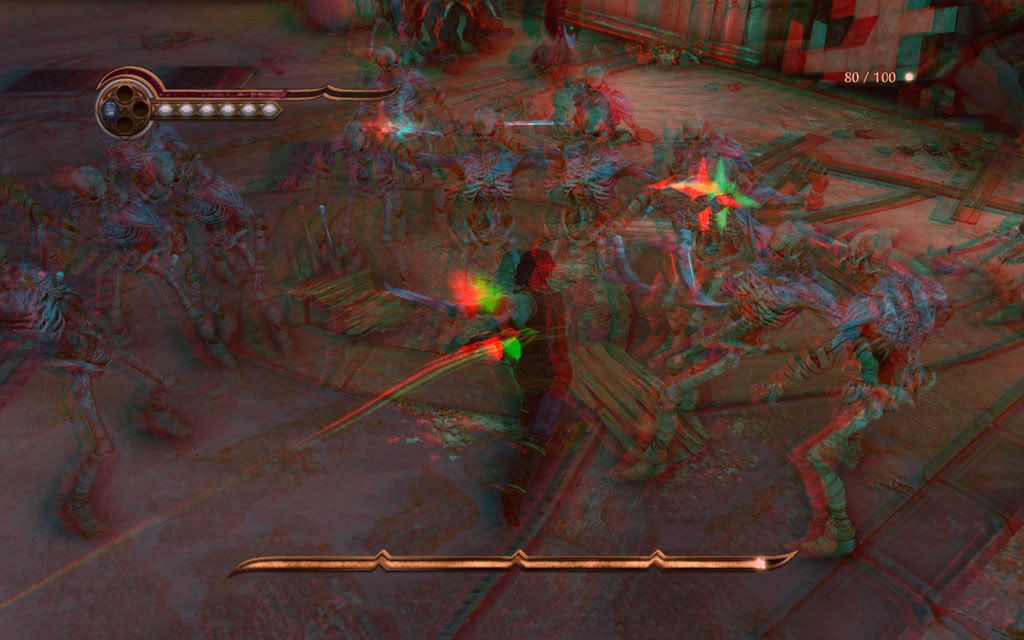
Prince of Persia also supports 3D and it's been rated as 'Excellent' by Nvidia. I've tested this with Nvidia 3D Vision Discover, and it works perfectly without any lags! Check out the 3D screen shots below and of cause, these wont work without a 3D glasses ;)


Check system requirements for 3D Vision Discover / 3D Vision now!


Language: MULTi9 (ENG/SPA/ITA/FRE/DUT/GER)
ISO size: 5.60GB
ISO MD5: 039c8700d1a0606093fd1f93dd3e0996

1. Extract the .rar files
2. Mount pop_tfs.iso or burn it. I prefer mounting using Daemon Tools
3. Install
4. Copy all the files from the Crack folder and paste it in the Prince of Persia The Forgotten Sands installation folder
  • * 32 bit version:
    C:\Program Files\Ubisoft\Prince of Persia The Forgotten Sands
  • * 64 bit version:
    C:\Program Files (x86)\Ubisoft\Prince of Persia The Forgotten Sands
5. Launch and play the game. Enjoy!
Download:
sorry guys...all my links are dead :( MAYBE later? :P
Crack (SKIDROW 2) ONLY:
http://rapidshare.com/files/404884984/pop_tfs_skidrowcrackv2_sykez.rar.html

Cracked by SKIDROW

Uploaded by ME, using the lazy upload method ^^

Assassin's Creed II

Finally...Assassin's Creed II! Yes, i know its been a while now...it was released in March and i had to wait for a crack. The crack was released in April when i was in Male' with a crappy laptop, so now i'm back in KL with my PC, and i'm addicted! ^^

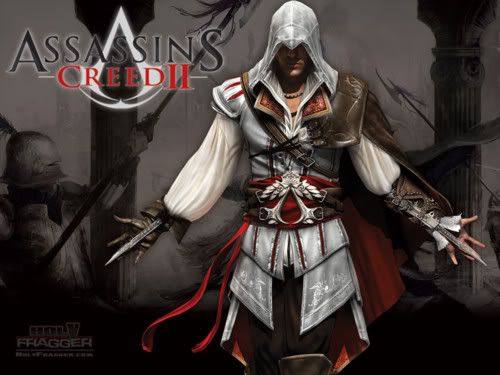
Assassin's Creed II is the second game of the Assassin's Creed series from Ubisoft. Assassin's Creed II was given the Best Action Adventure Game of the Year by IGN, Game of the Year by New York Times, GamePro, Eurogamer, and was also nominated to several other awards too. The game starts right from the point where the Assassin's Creed (I) ended. Desmond finally escapes from Abstergo with Lucy, an employee in Abstergo and also an Assassin, bringing him into her secret hideout where he meets other two Assassins. Desmond agrees to help them by discovering Ezio Auditore da Firenze's memories to find the Pieces of Eden and to gain Ezio's skills through the bleeding effect using their own version of Animus, the Animus 2.0.

Check out the gameplay trailer


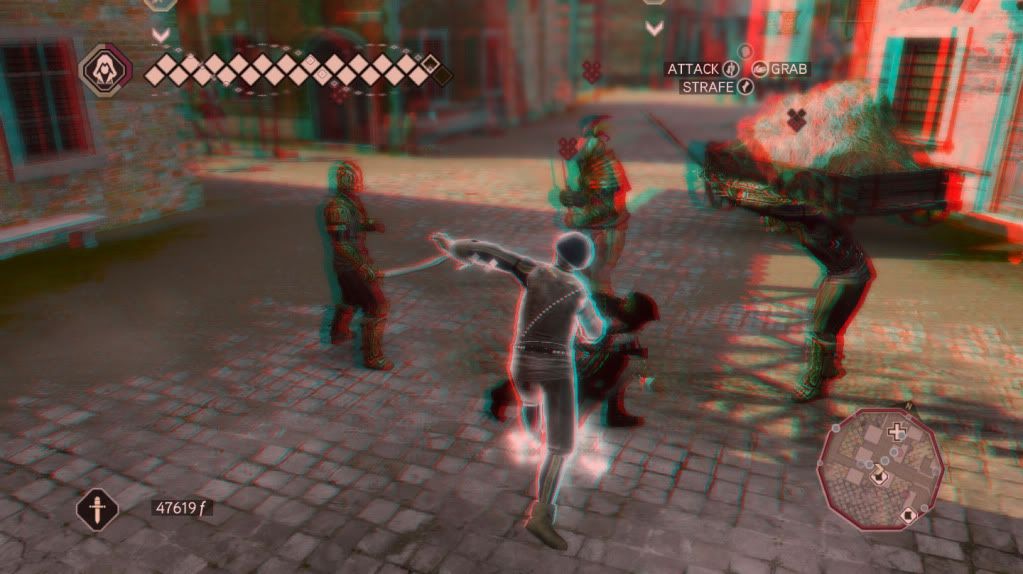
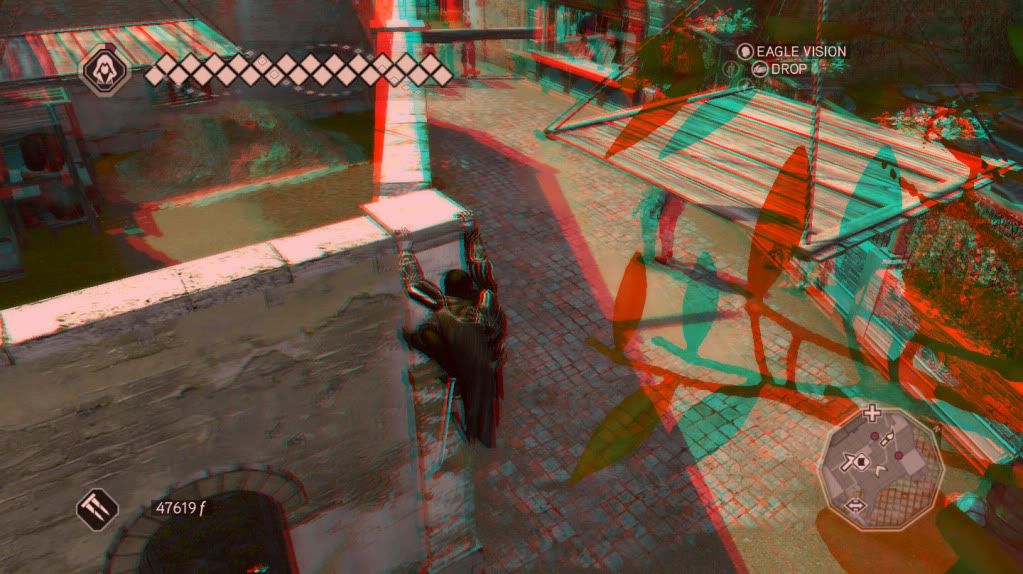
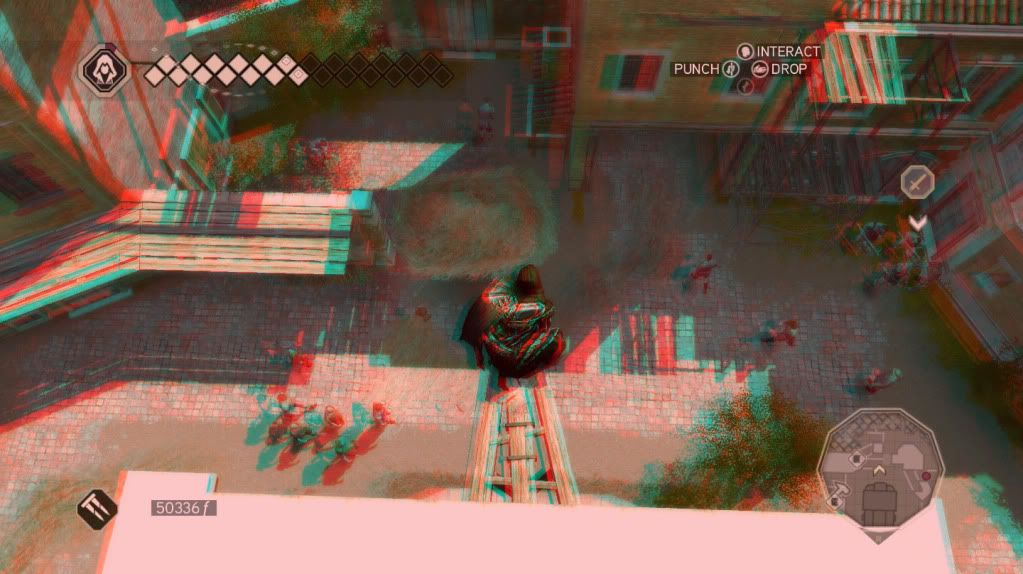
Just like Assassin's Creed (I), Assassin's Creed II also supports 3D. According to Nvidia 3D games, Assassin's Creed (I)'s rating is in 'Excellent' category, while Assassin's Creed II is under 'Good', but it works perfectly! 3D Vision is pretty expensive, while 3D Vision Discover is cheaper, as you only need is a 3D supported graphics card and a 3D Vision Discover glasses or a stereoscopic glasses. For a starter, i recommend to try 3D Vision Discover. I recently bought a 3D Vision Discover glasses on eBay. Check out the 3D screen shots below and of cause, these wont work without a 3D glasses ;)


So get 3D! Check system requirements for 3D Vision Discover / 3D Vision.

Download:
http://rapidshare.com/files/391486758/ac2_sykez.part01.rar
http://rapidshare.com/files/391488566/ac2_sykez.part02.rar
http://rapidshare.com/files/391528983/ac2_sykez.part03.rar
http://rapidshare.com/files/391527900/ac2_sykez.part04.rar
http://rapidshare.com/files/391688439/ac2_sykez.part05.rar
http://rapidshare.com/files/391680815/ac2_sykez.part06.rar
http://rapidshare.com/files/391710227/ac2_sykez.part07.rar
http://rapidshare.com/files/391717329/ac2_sykez.part08.rar
http://rapidshare.com/files/391846082/ac2_sykez.part09.rar
http://rapidshare.com/files/391846403/ac2_sykez.part10.rar
http://rapidshare.com/files/391887611/ac2_sykez.part11.rar
http://rapidshare.com/files/391887508/ac2_sykez.part12.rar
http://rapidshare.com/files/391917201/ac2_sykez.part13.rar
http://rapidshare.com/files/391916927/ac2_sykez.part14.rar
http://rapidshare.com/files/392035427/ac2_sykez.part15.rar
http://rapidshare.com/files/392033149/ac2_sykez.part16.rar
http://rapidshare.com/files/392058533/ac2_sykez.part17.rar
http://rapidshare.com/files/392066670/ac2_sykez.part18.rar
http://rapidshare.com/files/392120446/ac2_sykez.part19.rar
http://rapidshare.com/files/392116293/ac2_sykez.part20.rar
http://rapidshare.com/files/392166942/ac2_sykez.part21.rar
http://rapidshare.com/files/392167189/ac2_sykez.part22.rar
http://rapidshare.com/files/392247224/ac2_sykez.part23.rar
http://rapidshare.com/files/392247249/ac2_sykez.part24.rar
http://rapidshare.com/files/392295709/ac2_sykez.part25.rar
http://rapidshare.com/files/392296021/ac2_sykez.part26.rar
http://rapidshare.com/files/392370471/ac2_sykez.part27.rar
http://rapidshare.com/files/392369236/ac2_sykez.part28.rar
http://rapidshare.com/files/392405340/ac2_sykez.part29.rar
http://rapidshare.com/files/392405408/ac2_sykez.part30.rar
http://rapidshare.com/files/392450850/ac2_sykez.part31.rar
http://rapidshare.com/files/392450626/ac2_sykez.part32.rar
http://rapidshare.com/files/393147438/ac2_sykez.part33.rar
1. Extract the .rar files
2. Mount AC2_Sp4mm3r.iso or burn it. I prefer mounting using Daemon Tools
3. Install
4. Install the update, assassins_creed_2_1.01_us.exe from the Update folder
5. Copy the two files, SKIDROW.exe and ubiorbitapi_r2.dll from the Crack folder and paste it in the Ubisoft Game Launcher folder
  • 32 bit version:
    C:\Program Files\Ubisoft\Ubisoft Game Launcher\
  • 64 bit version:
    C:\Program Files (x86)\Ubisoft\Ubisoft Game Launcher\
6. Play! ...having trouble with saving the settings? Copy and paste the ubiorbitapi_r2.dll from the fix folder to Ubisoft Game Launcher folder. Enjoy!

Crack only download:
http://rapidshare.com/files/398466823/ac2_skidrow_crack_sykez.rar.html


ISO by Sp4mm3r
Cracked by SKIDROW
Uploaded by me, using the lazy uploading method :P

Too lazy to upload...why dont you do that for me? ^^

Uploading to RapidShare could be sometimes a pain in the ass. I used to use the RapidUploader and the RapidShare Manager to upload files. It takes like almost a day to upload a whole movie with some connection errors and so on... >.> So i figured another way by uploading to another server by FTP, and using remote upload to download those files into my RS account. I think its a pretty effective way to upload files to RS, just in case if those files were deleted or reported and you had to reupload it. Using the same idea, i thought why not remote upload those files directly from my PC! =D So, i used XAMPP as my web server, moved all the files into the web server and added the links into the remote upload list. It worked! ^^ ...of cause it'd work! :P RapidShare downloads 5 jobs simultaneously, and my upload speed is 0.5mb/s. After sometime i got this message saying the downloads have been aborted as it has exceeded 3 hours >.> I used 200mb files, so i changed them to 100mb files and then it worked perfectly! ^^
...on my way uploading Assassin's Creed II =D

How to make your own Counter Strike dedicated server on windows

It’s been a year already since I started playing Counter Strike and most of the times I play with my friends on my dedicated server hosted in my computer. So, here is a complete guide for all you guys who want to make your own Counter Strike (CS) dedicated server on windows, starting from installing and configuring CS, till making a web based ranking system. It doesn’t matter if it’s a pc or a laptop, as long as it has xp or vista. I haven’t tried it on windows 7, but I think it should.

Before we begin, these are the stuffs we’re gona cover in this guide:
  • Installing Counter-Strike: Source
  • Creating the server
  • Configuring the server
  • Installing Mani Admin Plugin (optional)
  • Intalling Metamod:Source
  • Intalling SourceMod
  • Installing Xampp
  • Intalling ActivePerl and DBD-mysql
  • Installing and configuring HLstatsX: CE
  • A bit of port forwarding
This guide contains two parts. Making the CS server and making the webhost. Okay, so now let’s get it started! ;)

Installing and configuring the CS server
  1. Download and install Counter-Strike: Source (installation instructions will be included). Let’s assume that you’ve installed in C:\Program Files\Counter-Strike Source\
  2. Go to C:\Program Files\Counter-Strike Source\ and look for srcds.exe. Right click and sent to desktop, which makes a shortcut on the desktop.
  3. Go to desktop, rename the srcds.exe shortcut to server, right click on it and go to properties.
  4. In the shortcut tab, add this line in the target field after the srcds.exe" part:
    -console -game cstrike +maxplayers 30 +map de_dust2 -secure

    shortcut

    -console: tells it to run as the console command interface, instead of the GUI, which takes more load than console.
    +maxplayers 30: how many players can join the game, in this case its 30.
    +map de_dust2: which map the server is going start with, in this case its de_dust2.
    -secure: secure the server with Valve Anti Cheat (VAC).
  5. Now it’s time make some basic settings for your server by using the server.cfg file in your C:\Program Files\Counter-Strike Source\cstrike\cfg\. If you don’t have that files, you can create it by using a cfgmaker to help you to generate it easily.
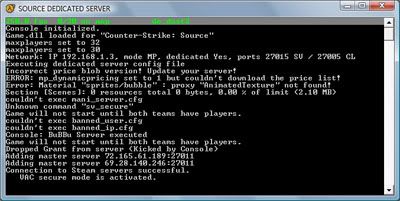
  6. Go to desktop and run the server shortcut. It should show up the console like the command prompt and starts to load some stuffs. If something goes wrong, go back to the step 4. After loading all those stuffs, run your Counter-Strike game, find your server in the LAN tab and join. Play around a bit; it’s just to check whether it works ;) So, basically your dedicated CS server is up and running on LAN, but it might not work through internet, when your friends try to join. Don’t worry; we’ll cover it up later. Shutdown the server by typing, exit in the console.
  7. This is an optional step, you may skip to step 9. Mani Admin Plugin makes it easier to manage the server, like kick, ban, change map, slap and more. Download Mani Admin Plugin and extract it into C:\Program Files\Counter-Strike Source\cstrike\. Go to your C:\Program Files\Counter-Strike Source\cstrike\addons\, open CreateVDF.exe, select cstrike and save it as mani_admin_plugin.vdf.
  8. Run the server and let everything gets loaded. If the server crashes, go back to step 7 and try installing a previous version of Mani Admin Plugin like v1.2 Beta O. After the server loads everything, to check whether Mani Admin Plugin was loaded, type:
    plugin_print
    ...and it should show something like:
    mani admin
    …or if it doesn’t, something is wrong with your installation. For troubleshooting, configuration and commands check the documentation. You can shutdown the server now.
  9. In order to make the HLstatsX in game ranking system to work, you need to have SourceMod, and SourceMod requires Metamod:Source. So let’s download Metamod:Source, installation instructions and troubleshooting can be found in AlliedModders Wiki.
  10. Download SourceMod and extract it into C:\Program Files\Counter-Strike Source\cstrike\. To check whether the addons are loaded, run your server and type:
    meta list
    …and it should show this line:
    meta list
    If it works, shutdown the server and proceed to next step, and if it doesn’t work, go back to step 9 or check out the AlliedModders Wiki.
  11. Download the HLstatsX: CE, extract it somewhere, and copy the sourcemod folder into C:\Program Files\Counter-Strike Source\cstrike\addons\.
The game server is now ready, and it’s time to setup the web server part now ;)

Installing and configuring the web server
  1. I’m gona’ use Xampp as the web server pakage. Download and install Xampp as to the instructions.
  2. HLstatsX Community Edition uses a Perl daemon to parse the log streamed from the game server”, so Perl has to be installed. You can use the Perl addon for Xampp, or use ActivePerl to run the perl scripts. I use ActivePerl and I recommend using it :)
  3. Open up Perl Package Manager (PPM) by typing ppm in the run. Search for dbd-mysql in the PPM, right click on it and install. Go to file, Run Marked Actions and you’re done!
    ppm
  4. Copy the web folder from the extracted HLstatsX file, into htdocs of your Xampp web server. Rename the folder to stats.
  5. I assume that your web server is working by now. So, go to http://localhost/phpmyadmin/ and make a new database. The username is root and there is no password by default. Let’s call this database, hlstatsx.
  6. Click on the hlstatsx database on the left side which you created, and go to the 'Import' tab on the top. Under the ‘File to import’, browse to the extracted HLstatsX folder, \sql\install.sql and ‘Go’.
  7. Open config.php, in your web server stats folder, with a notepad. Edit the file to match your settings:
    define("DB_NAME", "hlstatsx");
    define("DB_USER", "root"); - the default xampp username
    define("DB_PASS", ""); - the default xampp password is *none*
  8. Go to http://localhost/stats/hlstats.php?mode=admin and login as admin, with 123456 as the password. Add your server under game settings and play around a bit with the HLstatsX: CE settings.
    Server Address: your internal network IP
    Server Port: 27015
    Server Name & Rcon Password: See your server.cfg
    Game Mod: Sourcemod
  9. Go to your C:\Program Files\Counter-Strike Source\cstrike\cfg\ and open autoexec.cfg with a notepad. Add the following lines:
    log on
    logaddress_delall
    logaddress_add IP:PORT

    your IP will be the internal IP and the port can be 27500.
  10. Copy the perl folder from the extracted HLstatsX to the stats web server folder. Open hlstats.conf with a notepad and edit it to match your settings:
    DBHost "localhost"
    DBUsername "root"
    DBPassword ""
    DBName "hlstatsx"
    Port 27500
  11. Open up notepad and paste the following line:
    perl hlstats.pl
    ..save it as hlx_run.cmd in that folder. You may create a shortcut for the hlx_run.cmd in your desktop for easy use. Try running it. If it shows an error and closes, try checking your hlstats.conf, or if there is no error and if it doesn’t closes, it’s working!
Your game server and web server is now ready, but still you’re not done yet! ;) The last part is to open or forward your ports. To do that, you’ve to login into your router and set the ports. Most of the routers have the configuration for the web server and for Counter-Strike too, but if you don’t have or you don’t know, you can go to PortForward.com to get it done :)
For Counter-Strike server:
Protocol / Port start - Port end / Port Map
UDP / 1200-1200 / 1200
UDP / 27000-27015 / 27000
TCP / 27020-27039 / 27020

For web server:
Protocol / Port start - Port end / Port Map
TCP / 80-80 / 80
TCP / 443-443 / 443
You can check whether your web server is working by going to Hidemyass.com, enter your external IP and browse. You can get your external IP by going to Whatismyip.com. If you can access, that means its working! Once you are done, it’s time to finally start the server.
  1. Run the hlx_run and the CS server shortcut from the desktop.
  2. Run your CS game, join your server and add some bots.
  3. Minimize the game, go to http://localhost/stats/ and check the players and played times whether it matches. If it does, it’s working correctly, if it doesn’t, go back and check your steps carefully, because something is really screwed up!
  4. Tell your friends your IP and let the fun begin! :D If your IP is dynamic, its’ kinda annoying when your IP changes every time. So, you can use a free DNS service like afraid.org, which has many different kewl domains and they have a free DNS updating software so that, when every time your IP changes, it updates your DNS settings.
So, this is it! I hope this guide helped to make your own CS dedicated server and also about the web server too. If you have any questions, please drop a comment.

Ahoy! Its International Talk Like A Pirate Day! Arrr!!

Ahoy! Today is the International Talk Like A Pirate Day (ITLAPD)...arrr!! ITLAPD is a parodic holiday celebrated every year on September 19th. Many have been celebrating the ITLAPD around the world today, including Google, Facebook, Twitter and Friendfeed.

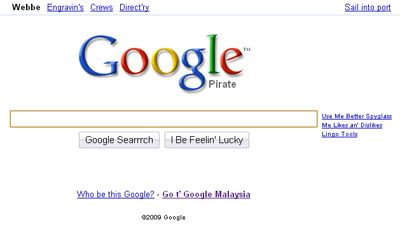
Pirate Google Searrrch..arrr!!
www.google.com/intl/xx-pirate/

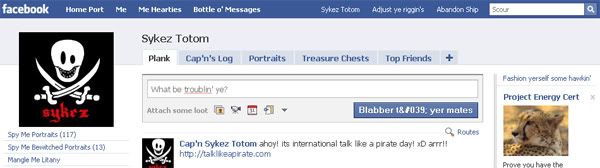
to celebrate the ITLAPD, Facebook has even added the Pirate language feature which changes alot around...like the Logout part becomes Abandon Ship and Inbox becomes Bottle o' Messages. Wana' check it out? Just simply go to the bottom of your facebook page and change the language to English (Pirate) from English

for more info, check out the ITLAPD official website:
www.talklikeapirate.com

Tagged!! O_o

whoah...!! m tagged by Cielo Sama :P laayee!! XD thankx for the tag btw...umwah!

1. wat's ur latest addiction?
* err...eatin yogurt XD

2. wat r u listnin to?
* music!! =D

3. how late did u stay up last nyt n y?
* errr..like 3 i guess...to watch some movies XD

4. who were u wit last friday nyt?
* with ma friendx =D

5. do u think u will b in a relationship 3 mnths frm nw?
* maybe...

6. wen is da next tym u'll see ur clz frnds?
* maybe tomorrow...

7. wat were u duin this mrnin at 7am?
* sleeping...XD

8. wat radio station do u listn to da most?
* hfm

9. wat was da reason u last cried?
* err..i cant remember...

10. hav u evr talk'd to sumone wen they were high?
* lol..yeah!

11. wat's da fifth text in ur inbox say?
* "PLEASE CALL 7*9*8*2 - From Dhiraagu "Call Me Back" Service"

12. Whr was da last cofy shop u go to?
* last week

13. wat's ur outfit ryt nw?
* black shirt and black shorts

16. wat were u duin at 11pm last nyt?
* on a call..;)

17. who was da last person u talked to last nyt b4 bed?
* LuLu babe! XD

18. will u b drivin in a year?
* yeah maybe...XD

19. is thr nethn tht u r craving ryt nw?
* yeah...

20. wen did ur last hug take place?
* on the road =D

22. hav u evr started a sentence wit "No offense, but..."?
* naah..

23. Do u drink tea?
* not usually...

24. hav u evr byn arrested?
* hehe..naah..!!

25. hav u rode in sum1 els's car 2day?
* nope

26. hav u made a mistake this past week?
* yeah...:(

27. who was da last person u texted?
* my classmate...

28. r u happy wit ur life ryt nw?
* naah..

29. in da past 72 hrs hav u byn undr da influence of slyp?
* hehe yeah...

30. wat's da connection between u n da last person u texted?
* friends... =)

time for me to tag!! XD rezorn and ne3...u've been tagged!! :P ..btw where did the question 14,15 & 21.. go :S

Userbars

Hey guys...check these new userbars i've made ;)


Maldivian - proud to be a Maldivian
Proud to be a Maldivian

Proud to be a Maldivian

Dhiraagu user
Dhiraagu user

Dhiraagu user

Wataniya user
Wataniya user

Wataniya user

ROL user
ROL user

ROL user

MvBlogs user
MvBlogs user

Raajje.tv user
Raaje.tv user

Reload gamer
Reload gamer

Reload gamer

RockStorm fan
RockStorm fan

Lecute RockStorm fan

Stygian Shores fan
Stygian Shores fan

Serenity Dies fan
Serenity Dies fan

Sacred Legacy fan
Sacred Legacy fan

Tormenta fan
Tormenta fan

FasyLive fan
FasyLive fan

EvilCommunity user
ECian

EC member

EC user

Euro fan
Euro fan


More userbars coming up... comments and requests are welcome ;)

No to terrorism!! Dont touch touch our Maldives!!

We don't want terrorists and terrorism in our Maldives!
Join the cyber-protest by Maldivian bloggers.

After a long time…

Arrh!! Its been so long time I didn’t blog and didn’t even look at ma blog :P So lets see…how long have it been? I last posted on Dec 2006…OMG!! Its been 9 months now!! O_o

I was actually kinda buxy with some other stuffs and I forgot about ma damn blog :P and also with the new Blogger, by mistake I switched ma blog to the a wrong Google account!! I tried to switch it to another Google account but it didn’t work. Since then I didn’t feel like blogging anymore and I was thinking of quit blogging… Many of ma friends were complained about it, but still I didn’t feel like…lol :P Anyways, now I finally switched ma blog to another Google account and maybe…im back to blogging again...so wish me luck ;)

How To Add A Digg Button To Your Website/Blog

I found a very interesting tutorial while I was surfing the web. It’s a tutorial on how to add Digg counter button to your website or blog for every single post. Kewl ehh?? So your blog visitors can Digg it…any ways here is the tutorial….enjoy!! ;)

Adding Digg button to your blogger posts tutorial

Integrating Digg within your website tutorial

Recovering Deleted Data & Securing Deleted Data

Recovering Deleted Data

Data loss is one of the huge problems for almost all the computer users. Sometimes files get lost due to some program crashes, or files get deleted accidentally, or by a virus or maybe some other problems. It is possible to recover files easily which are deleted permanently, even if you empty recycle bin and even if you format your hard disk. To do the recovery process, you need a software to do it. I found a list of data recovery software in Wikipedia, and also Jaa and Bondhalhey have also posted an entry on data recovering which may also help.


Securing Deleted Data

Now that the deleted files can be recovered, I’ve been thinking then how to erase those deleted files in the hard disk like a clean new born one. After hours of surfing the web I found an article which explains the data recovering and securing them (Secure Deletion of Data from Magnetic and Solid-State Memory by Peter Gutmann) and some software which erases the deleted files. I found that Killdisk also does that job so I tried with it and it works but, because I got the free version some features are disabled so I didn’t like it at all. So then I tried Darik's Boot and Nuke 1.0.7. Darik's Boot and Nuke is freeware and is available to download from the project page. I found that Darik's Boot and Nuke 1.0.7 has the Gutmann method feature which is a high security method but following this method will take a lot of time depending on the hard disk capacity you have. Darik's Boot and Nuke software first create a bootable floppy disk/USB flash drive. It is very easy use and by entering “autonuke” command, it wipes out all the devices connected to the computer automatically. Here are some screen-shots and features of it. So I hope this will help many people and specially for companies, offices, shops and others who sell their old computers to buy new ones.

New Theme


Arrh!! Finally...I've made my own theme with my own design ;) hope you all will like it. I just released this theme as soon i finished it. So there maybe few things (bugs) to fix. Please comment about my new theme and also it will be helpul if you comment about a thing which need to be fixed if there are ;)

Windows Media Player 11

Microsoft has released Windows Media Player 11 final gold version on 30th Oct to the public. WMP 11 is available for Windows XP to download and of course to the upcoming Windows Vista. Windows Media Player (WMP) 11 features are built-in support for Urge, which is a subscription music service co-developed with MTV, streamlined and simplified interface, fast access to shortcuts and settings, universal back and forward button, revamped playback controls, faster CD ripping, Reverse Sync from portable device to PC, improved searching, and supports new formats for ripping and playing music, namely Windows Media Audio Professional and WAV Lossless. WMP 11 is designed with a whole new look to the digital entertainment. "When designing Windows Media Player 11, we looked at the needs of a wide range of users—from people who are just getting started with digital media to discriminating audiophiles with very large collections on their PCs. By incorporating this feedback into the design process, we made some significant changes to the Player to deliver a simpler, more visual way to navigate music, video, and other digital media and further improve the overall experience."
For me, WMP 11 looks rocks with the new design and its is one of the main thing which made it a success. Its not only me who says this, this new design has won praise from many reviewers.
Click here to learn more, click here for readme and here are some screenshots (sc1, sc2).

WMP 11 can be downloaded from the Windows Media Home or Windows Media Player 11 page which directs to the Windows Media Player download page without WGA validation. WMP 11 can also be downloaded from the Microsoft Download page, but from there, WGA validation is required to download. However, WGA validation is required when installing. So Windows which are not Genuine need s crack/hack to install WMP 11. I've posted a entry for bypassing WGA and also here is an article which may help you with this. Enjoy ;)

Btw, Mircosoft has announced that Windows Vista will be broadly available as a stand-alone product or pre-installed on new PCs on January 30, 2007 and Windows Vista was released to manufacturing (RTM) on 8th Nov.

Bypassing Windows Genuine Advantage (WGA)

There are couple of methods to crack and disable WGA validation tool, WGA notifications and download & install Microsoft products by bypassing Genuine Windows, but now lots of bypassing methods no longer works. So this article contains the popular and easiest working methods on bypassing and so you can wont get any annoying WGA notifications and you will pass from the WGA validation tool and of course then you can download the Microsoft products such as Windows Defender, Internet Explorer 7, Windows Media Player 11, DirectX etc.

Steps to bypass Windows:

*Note: This method most likely works on Windows XP SP2 (Service Pack 2) only. If you still haven’t upgrade to SP2, you can download Windows XP Service Pack 2 that no need any validation to download and install via direct download link.

1. Download & extract WindowsLicense.rar / wpa_registry.rar whichare archive files and contains the same registration file (.reg).
2. Double-click on the file in the registry entry file (.reg) in the archive, and answer as 'Yes' when asked whether want to add the information to the registry to hack the registry.
3. The Windows is now licensed, legal, Genuine activated and you should be able to pass all validation. You test it by using the Microsoft Genuine Advantage Diagnostic Tool or validate from Genuine Microsoft Windows online. Of course, until the next Mircosoft update ;)

If you cant download the files above and if you want to see the actual registry keys and branches which was entered to the Windows Registry click here.

*Note: Some users reported that the hack on the registry trick is erased, reverted or reset once reboot or restart your PC. If so, here is the full updated article with couple of methods of bypassing. Enjoy ;)

Generic Host Process for Win32 Service Error

A few days ago, while i was surfing the web, an error occurred and it disconnected me from the internet. So i restarted my pc and after that i've been getting this annoying error everytime my computer is turned on and connected to internet for about 5 or 12 mins and the error message appears and it disconnects me from the internet, MSN , IRC and browser too and couldnt reconnect again. So i restart my pc everytime i get that error, was too lazy to fix it. hehehe! I got really mad about that problem and i started to work on my other pc with the same connection, not even half an hour, the annoying error popped on that even! So finally i thought of fixing that.

(click on the image to enlarge)

I checked my event viewer and i found this:

Event Type: Error
Event Source: Application Error
Event Category: (100)
Event ID: 1000
Date: 11/19/2006
Time: 11:11:19 PM
User: N/A
Computer: SYKEZ

Description:
Faulting application svchost.exe, version 5.1.2600.2180, faulting module netapi32.dll, version 5.1.2600.2180, fault address 0x0000a3c0.

Data:
0000: 41 70 70 6c 69 63 61 74 Applicat
0008: 69 6f 6e 20 46 61 69 6c ion Fail
0010: 75 72 65 20 20 73 76 63 ure svc
0018: 68 6f 73 74 2e 65 78 65 host.exe
0020: 20 35 2e 31 2e 32 36 30 5.1.260
0028: 30 2e 32 31 38 30 20 69 0.2180 i
0030: 6e 20 6e 65 74 61 70 69 n netapi
0038: 33 32 2e 64 6c 6c 20 35 32.dll 5
0040: 2e 31 2e 32 36 30 30 2e .1.2600.
0048: 32 31 38 30 20 61 74 20 2180 at
0050: 6f 66 66 73 65 74 20 30 offset 0
0058: 30 30 30 61 33 63 30 000a3c0


I met few people who got the same annoying error and some people told its a virus or something. So i scaned my pc with NOD32, Ad-aware SE , Spyware Doctor which are update-to-date, but it didnt detect any virus or anything. Some people have formatted their pc, but still the annoying error appears. I was so desperated and finally one of my friend came with a solution for this and since there are many people who got this old annoying error and also it keeps increasing day by day. So i've decided to post about this so people who got this problem can fix it without getting mad ;)
All you got to do is, close the so called port 135 & 445

To close it, do the following steps:
  1. Open Registry Editor by going to Start>Run and in the box type: regedit.exe and press OK.
  2. Now, from the Registry Editor, go to Edit>Find or Ctrl+F and write "TransportBindName" in the box without the quotation mark. It may take few mins to search. This value can be found in HKEY_LOCAL_MACHINE\SYSTEM\ControlSet001\Services\NetBT\Parameters
  3. Double-click on that value and delete the default value in the box and press OK.
  4. Find the value "EnableDCOM" which can be found in HKEY_LOCAL_MACHINE\SOFTWARE\Microsoft\Ole
  5. Double-click on that value and set the value in the box as 'N' which currently maybe set as 'Y'.
  6. Close the Registry Editor and restart your pc.

You can also download Windows Worms Doors Cleaner (WWDC) and close 135, 445 and NetBIOS (if necessary) or all the ports, but by disabling only 135 & 445 my pc seems to be normal without formatting my pc. One of my friend told this problem can be fixed by a patch from Microsoft and by using a registry cleaner and also he told this problem can be created by a virus called w32/sbotworm which attacks those ports. That virus is detectable from McAfee and the virus maybe still trying to get around the fix and again create that same old annoying error. So you need to update windows and virus definitions.

So anyways i hope you can get out of this annoying thingy. Good luck and thankx for slees and vixhal for this great solution. Cheers ;)

Back To Bloging again...

Its been been months i didnt blog. So back again with my blog... ;)

Gmail for your domain

Bring Gmail to your domain!!!??? im really excited abt dis....buh itz BETA...
Bring Gmail to your domain.

This special beta test lets you give Gmail, Google's webmail service, to every user at your domain. Gmail for your domain is hosted by Google, so there's no hardware or software for you to install or maintain.

Want to be part of this beta test?

Gmail for your domain is currently available as a limited beta. If your organization is interested in helping Google test this service, we'll consider your domain for this beta. You'll need to sign in with a Google Account (or get a new one), and answer a few quick questions about your organization and your email needs.

Discussion Forum

Related:
http://www.primary0.com/2006/06/04/screenshots-gmail-for-your-domain/

The Storm Is Coming...

CQ Presents THE ROCK§TORM! L!ve performance by Fasy, Stigmata and Serenity Dies...
 
Copyright Info.

Copyright 2009 sykez
Powered by Blogger and BTemplates

Partners
Other Links
XHTML/CSS validations
Valid XHTML 1.0 Transitional Valid CSS!